

Every home tells a story through the subtle shifts of its materials, the quiet hum of its mechanical systems, and the way it responds to the changing seasons. For most people, a house is the largest financial investment they will ever make. Yet, it is remarkably easy to fall into a routine of passive residency, noticing a problem only when a ceiling stains, a circuit trips, or a basement floor fills with two inches of standing water.
Waiting for a catastrophic failure is an incredibly expensive approach to property management. A proactive, annual self-inspection shifts a homeowner from a defensive posture to an offensive one. By dedicating a single weekend each year to walking your property with a critical eye, a flashlight, and a notebook, you can catch minor wear and tear before it mutates into a major financial disaster. This practice is less about adding chores to a weekend list and more about protecting your hard-earned equity.
When you systematically evaluate your house from the roof down to the soil, you develop an intimate understanding of how your home breathes, sheds water, and regulates temperature. This comprehensive guide breaks your property down into manageable zones, offering deep, practical diagnostic insights to ensure your living space remains safe, efficient, and secure for years to come.
Evaluating the Roof and Attic Space

The highest points of your home bear the brunt of nature’s elements, enduring baking solar radiation, driving rain, heavy snow loads, and scouring winds. Assessing this zone requires a careful balance of external observation and internal investigation to ensure your primary shield remains completely uncompromised.
To inspect the exterior of your roof safely, you do not necessarily need to climb a ladder. Grab a high-powered pair of binoculars and step back into your yard where you have a clear line of sight. Scan the roof systematically, moving row by row. Look closely for shingles that are curling at the edges, buckling in the center, or missing entirely. Pay special attention to the valleys—the areas where two roof planes meet—as these carry the highest volume of water runoff. Examine the flashing around chimneys, skylights, and vent pipes; if the metal is rusted or the protective caulking has cracked and peeled, water will inevitably find its way inside. Catching these vulnerabilities early allows you to schedule minor roofing repair work before a major storm forces an entire, premature roof replacement.
Once you finish the exterior visual scan, move inside to the attic during a bright, sunny afternoon. Turn off the attic lights and look up. If you see pinpricks of daylight peeking through the roof decking, you have identified an immediate leak path. Next, bring out your flashlight to inspect the underside of the wood and the tops of your insulation batts. Look for dark water stains, white powdery efflorescence on structural wood, or localized mold growth. These are definitive signs that moisture is bypassing your shingles or that your attic lacks adequate ventilation, causing humid indoor air to condense against the cold underside of the roof.
Proper drainage is the natural partner to a healthy roof. When gutters fill with autumn leaves, pine needles, and asphalt shingle granules, water backs up under the lower edge of the roofline, rotting the fascia boards and eventually seeping into your exterior walls. While cleaning gutters twice a year is standard advice, you should also check the physical integrity of the hanging brackets and the slope of the troughs. A gutter that sags or tilts away from the downspout will pool water, creating a breeding ground for mosquitoes and weighing down the eaves. For homeowners tired of the dangerous, bi-annual ritual of balancing on a ladder to scoop out decomposing organic sludge, investing in premium gutter guards can permanently solve clogging issues, keeping water flowing safely away from your home’s foundation without the constant manual labor.
Sealing the Exterior Building Envelope
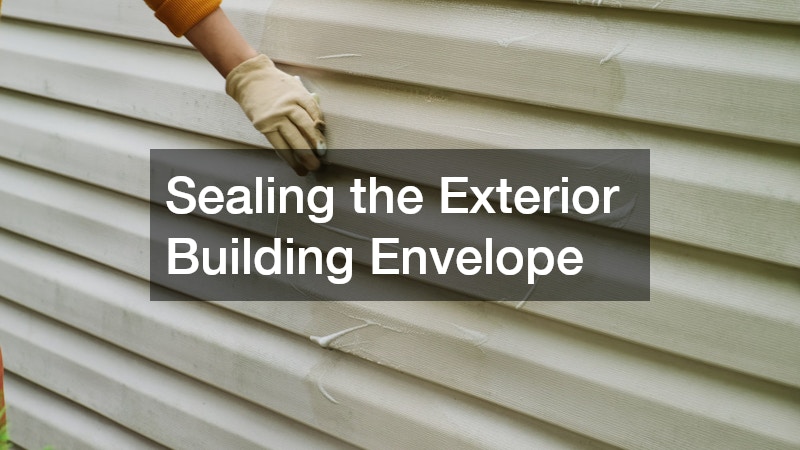
Moving down from the roofline, the exterior walls, windows, and attached structures form the second line of defense against the environment. This envelope must remain tightly sealed to prevent moisture intrusion and to stop expensive, conditioned indoor air from escaping into the neighborhood.
A smart way to diagnose the health of your building envelope is to perform a detailed perimeter walk, looking specifically at the transition points where different materials meet. Examine the caulking around your window frames and exterior door trim. Over time, UV rays cause standard sealant to shrink, crack, and pull away from the siding. If you notice drafts inside your home, or if you spot wood rot blooming along the exterior sill, it is a clear indicator that the window is failing to maintain its thermal barrier. While minor gaps can be temporarily remedied with a high-quality exterior polyurethane caulk, older wood frames that have suffered extensive dry rot or vinyl frames with failed, foggy double-pane glass are clear candidates for replacement windows, which instantly restore structural integrity and slash monthly utility bills.
After verifying the windows and siding, turn your attention to the outdoor living structures attached to the house. Decks and porches are highly susceptible to weathering because they feature horizontal surfaces that hold water and snow for extended periods. Check the ledger board—the critical point where the deck fastens to the house—to ensure it is properly flashed and securely bolted. Walk the perimeter of the deck and firmly shake the perimeter barriers. A loose perimeter guard is an immediate safety hazard for family and guests. If you notice wobbling, check the underlying carriage bolts and structural posts for rot. Often, a weekend spent executing a secure deck railing installation with heavy-duty structural screws and updated post bases can save a deck from a dangerous failure and bring the entire structure back up to modern building codes.
Optimizing Interior Living Spaces and Comfort Systems

The interior inspection is less about looking for catastrophic structural failures and more about fine-tuning your daily environment, ensuring interior finishes are preserved, and verifying that your primary comfort machinery is operating at peak efficiency.
Checking High-Use Surfaces and Plumbing Hubs
The kitchen and bathrooms are the hard-working utility hubs of the home, exposed to daily moisture, heat, and heavy physical impacts. Begin your interior check by looking beneath every sink with a flashlight. Run the water, fill the basin, and release it all at once to put maximum pressure on the drain pipes. Feel along the P-trap and the shutoff valves for any trace of moisture. Even a slow, rhythmic drip can quietly destroy subflooring and breed toxic mold behind cabinetry over the course of a year.
Step back and look at the surfaces that define these rooms. Inspect the silicone sealant where your kitchen countertops meet the backsplash or the sink rim. If this sealant is peeling or discolored, scrape it away, clean the area with rubbing alcohol, and lay down a fresh bead of mold-resistant silicone. For stone surfaces like granite or quartz, perform a quick water-droplet test. Splash a few drops of water onto the surface; if the water beads up cleanly, the sealer is intact. If the stone absorbs the water and darkens within a few minutes, it is time to apply a fresh coat of penetrating stone sealer to protect your investment from permanent stains.
Evaluating Climate and Air Quality Systems
A home’s interior comfort depends heavily on how well its mechanical systems handle air distribution and temperature regulation. A neglected HVAC system works twice as hard to achieve the same results, spiking your energy bills and wearing out its internal components prematurely.
- Turn off the power to the unit and slide out the air filter. If you cannot see light through it, replace it immediately with a pleated filter matching the manufacturer’s recommended MERV rating.
- Walk through every room in the house to ensure that supply registers and return vents are completely unobstructed by furniture, heavy drapes, or thick carpets.
- Inspect the outdoor condenser unit, clearing away any encroaching weeds, leaves, or mulch that might choke the airflow across the aluminum cooling fins.
- Test your thermostat’s accuracy by placing a separate digital thermometer next to it for an hour to see if the readings match.
Taking these steps optimizes your central heating system before the bitter cold of winter arrives, ensuring that fuel is burned cleanly and warmth is distributed evenly throughout the living spaces.
Managing the Substructure and Heavy Utility Equipment

The deepest parts of your home contain the critical systems that anchor the building’s weight and manage the core utilities that keep the household functioning smoothly day in and day out.
Investigating the Foundation and Managing Groundwater
A home is only as stable as the soil it sits upon and the concrete that cradles it. Step into your basement or crawlspace with a high-powered flashlight and look closely at the perimeter walls. Minor hairline cracks in concrete are common as a home settles, but you should take note of any horizontal cracks, stair-step cracks in brick mortar, or gaps wider than one-eighth of an inch.
When conducting this visual basement check, pay close attention to signs of changing structural forces and hydrostatic pressure:
- Horizontal cracks running along the midpoint of the concrete block walls, which indicate outside soil pressure.
- Inward bowing or bulging of the foundation walls.
- White, powdery efflorescence blooming across the masonry surfaces, proving that water is migrating through the barrier.
- Sticking doors or sudden drywall cracks on the upper levels of the home.
If you notice these shifts, document the changes immediately. Tracking these changes annually allows you to consult an engineer for targeted foundation repair before shifting soil compromises the safety of the entire building envelope. While you are downstairs, look at the base of the walls for white, powdery efflorescence. This mineral deposit proves that hydrostatic pressure is forcing moisture through the concrete, a clear sign that you need to improve your exterior grading so that soil slopes away from the house at a drop of six inches over the first ten feet.
Servicing High-Vulnerability Mechanical Units
Next to the foundation walls sits the heavy machinery responsible for your daily hot water supply. Water heaters work constantly under high pressure and are prone to internal corrosion due to the mineral content in municipal and well water supplies.
- Flush the Tank: Attach a standard garden hose to the drain valve at the bottom of the water heater and run the water into a floor drain or bucket until it runs perfectly clear. This removes the thick layer of calcium and sediment that settles at the bottom of the tank, which insulates the water from the heating element and causes the metal tank to overheat and crack.
- Test the T&P Valve: Briefly lift the lever on the temperature and pressure relief valve at the top of the unit. Water should discharge into the overflow pipe and stop completely when you release the lever. If it continues to drip, the valve is faulty and must be replaced immediately.
- Inspect for Corrosion: Look closely at the dielectric nipples where the cold and hot water lines connect to the top of the tank. Rust or green corrosion here indicates a slow leak that can eventually lead to a catastrophic tank rupture. Catching these signs allows you to handle minor water heater repairs proactively on a calm weekend, avoiding an emergency call-out fee when the unit completely fails on a holiday.
Verifying Automated Openers and Emergency Systems
The final phase of your annual inspection moves toward your home’s attached outbuildings and its emergency backup infrastructure, ensuring that your automated systems operate safely and your family remains protected during unexpected power disruptions.
Start by stepping into the garage to check the largest moving object attached to your home. Garage doors operate under massive mechanical tension, and a failure can result in significant property damage or severe injury. Begin your test by pulling the emergency release cord and operating the door manually. It should roll up and down smoothly with minimal resistance, and if you leave it halfway open, it should stay in place; if it crashes down or shoots upward, the counterbalancing springs are out of balance. Step back and look at the tracks, rollers, and cables for signs of fraying or excessive wear. While a homeowner can easily wipe down the tracks and apply a dedicated silicone-based garage door lubricant to the rollers and hinges, any balance adjustments or spring replacements should prompt you to call a specialist for professional local garage door repair to avoid the immense danger of working with high-tension steel components. Once lubricated, test the auto-reverse safety features by placing a solid wood block on the floor in the door’s path. When the door descends and strikes the block, it should instantly reverse and open.
Finally, shift your attention to your home’s emergency readiness strategy. If your region is prone to severe summer storms, rolling blackouts, or freezing winter blizzards, a backup power source is a necessity rather than a luxury. Walk out to your standby unit, clear away any dead leaves or debris from the enclosure vents, and open the access panel to check the battery terminals for corrosion. Check the engine oil level and inspect the spark plugs, just as you would for a lawnmower or a vehicle. Turn the system to manual mode to ensure it starts up smoothly without hesitation and registers the correct voltage output. Keeping a disciplined schedule for maintaining a local whole home generator ensures that when the municipal grid goes dark, your lights stay on, your refrigerator keeps food preserved, and your sump pump keeps running to protect your basement from flooding.
Creating an Actionable Home Maintenance Strategy
Once you have completed your walk-through and filled your notebook with observations, take a deep breath. It is completely normal to finish an annual inspection with a list of five, ten, or even fifteen separate areas that require attention. The goal of a self-inspection is not to create immediate panic, but rather to remove the element of surprise from your homeownership experience.
Review your notes and categorize your findings into three distinct tiers: immediate safety or structural hazards, seasonal maintenance items, and long-term aesthetic or efficiency upgrades. Address the immediate hazards first, such as clearing a blocked dryer vent, securing a loose railing, or fixing a dripping plumbing valve. Items that require professional tools or licensing can be budgeted for and scheduled systematically throughout the coming year, allowing you to gather multiple quotes and work with trusted local specialists without the stress of an ongoing emergency.
By transforming this inspection into a non-negotiable yearly ritual, you take complete ownership of your living environment. You will find that your home runs more quietly, your utility bills remain predictable, and the value of your property is preserved for decades to come. Turn your annual inspection into a habit, and your home will reward your diligence with safety, comfort, and enduring peace of mind.